Wednesday, June 17, 2009

Anthony Bourdain's Kitchen Confidential Updated

Kitchen Confidential Updated Ed:
Adventures in the Culinary Underbelly
Kitchen Confidential Updated Ed: Adventures in the Culinary Underbelly (P.S.) (Paperback) by Anthony Bourdain
According to a Review by Sumi Hahn at Amazon.com;
Most diners believe that their sublime sliver of seared foie gras, topped with an ethereal buckwheat blini and a drizzle of piquant huckleberry sauce, was created by a culinary artist of the highest order, a sensitive, highly refined executive chef. The truth is more brutal. More likely, writes Anthony Bourdain in Kitchen Confidential, that elegant three-star concoction is the collaborative effort of a team of "wacked-out moral degenerates, dope fiends, refugees, a thuggish assortment of drunks, sneak thieves, sluts, and psychopaths," in all likelihood pierced or tattooed and incapable of uttering a sentence without an expletive or a foreign phrase. Such is the muscular view of the culinary trenches from one who's been groveling in them, with obvious sadomasochistic pleasure, for more than 20 years. CIA-trained Bourdain, currently the executive chef of the celebrated Les Halles, wrote two culinary mysteries before his first (and infamous) New Yorker essay launched this frank confessional about the lusty and larcenous real lives of cooks and restaurateurs. He is obscenely eloquent, unapologetically opinionated, and a damn fine storyteller--a Jack Kerouac of the kitchen. Those without the stomach for this kind of joyride should note his opening caveat: "There will be horror stories. Heavy drinking, drugs, screwing in the dry-goods area, unappetizing industry-wide practices. Talking about why you probably shouldn't order fish on a Monday, why those who favor well-done get the scrapings from the bottom of the barrel, and why seafood frittata is not a wise brunch selection.... But I'm simply not going to deceive anybody about the life as I've seen it."
Quote from the book
What most people don't get about professional-level cooking is that it is not at all about the best recipe, the most innovative presentation, the most creative marriage of ingredients, flavors and textures; that, presumably, was all arranged long before you sat down to dinner. Line cooking — the real business of preparing the food you eat — is more about consistency, about mindless, unvarying repetition, the same series of tasks performed over and over and over again in exactly the same way. The last thing a chef wants in a line cook is an innovator .... Chefs require blind, near-fanatical loyalty, a strong back and an automaton-like consistency of execution under battlefield conditions.

Book Details

Paperback: 352 pages
Publisher: Harper Perennial; Updated edition (January 9, 2007)
Language: English
ISBN-10: 0060899220
ISBN-13: 978-0060899226
Product Dimensions: 7.9 x 5.2 x 0.9 inches

Kitchen Confidential Updated Ed: Adventures in the Culinary Underbelly (P.S.)

Friday, June 12, 2009

Tangy Tart Hot and Sweet by Padma Lakshmi

Tangy Tart Hot and Sweet:
A World of Recipes for Every Day
Tangy Tart Hot and Sweet: A World of Recipes for Every Day (Hardcover) by Padma Lakshmi


From Publishers Weekly;
The host of TV's Top Chef, Lakshmi (Easy Exotic) puts her own culinary skills to the test in this glossy, cosmopolitan cookbook. Here, in vibrant colors, are her own palate-shaping memories in the form of recipes and short but highly personal essays. Like Nigella Lawson, Lakshmi's sex appeal is part of her draw as a food personality, and this collection obliges with adorable family photos as well as glamour shots of the model/actress nibbling on her creations. The global cuisine runs the gamut from a Southeast Asian–style Warm Peanut Salad with Tomato and Cilantro to Persian Chicken Soup with Omani Lemon and Dill to fried chicken battered with Rice Krispies. Keralan Crab Cakes and Pineapple and Pomegranate Crumble are among the fusion dishes that blend cuisines with intriguing results. Interspersed throughout are plenty of South Indian classics, reflecting Lakshmi's own heritage. Lakshmi has an inventive knack for flavor combination, but some of her recipes, like a Barbecued Shrimp with Chili Honey Butter, don't quite live up to the hype. Nevertheless, this book will certainly be well received by Lakshmi's growing fan base as well as home cooks looking to mix it up in the kitchen.

Wednesday, June 10, 2009

Chen Kenichi the Iron Chef


You can watch the rest of this episode at YouTube.

According to Wikipedia;

Chen Kenichi was born January 5, in 1956 in Tokyo, Japan. His name is often romanized Chin Kenichi in Japanese sources. He is a Han Chinese chef best known for his role as the Iron Chef Chinese on the television series Iron Chef. He wears a yellow outfit and holds a cleaver in his introduction. He is the only Iron Chef to have held his position throughout the life of the show. He was born in Japan to ethnic Han Chinese parents of Japanese nationality and his formal name is Ken'ichi Azuma.

Iron Chef Chen's Knockout Chinese
Iron Chef Chen's Knockout Chinese (Paperback) by Chen Kenichi
please click image


Friday, June 5, 2009

Top Chef The Cookbook

Top Chef The Cookbook
Top Chef The Cookbook (Hardcover)
From Publishers Weekly
Part fanzine, part cookbook, this volume will appeal to the anyone who tunes into Top Chef each week to see contestants out-cook each other, using vending-machine ingredients to make appetizers or preparing lunch for the cast of a telenovela. Replete with dozens of glamour shots of contestant/contributors and sweetly old-fashioned profiles of the judges (host Padma Lakshmi is "a no-nonsense kind of gal"), this volume feels like a guide to a strange, food-obsessed cult. The author sighs over pretty, eccentric Betty Fraser, "it was always hard to know what to make of Betty," and notes that season two winner Ilan Hall was "good at falling into the kind of cliquish drama you might find in a high school cafeteria." The recipes themselves, taken directly from the show's "quickfire" and elimination challenges, are dauntingly involved, much more suited to cooking competitions than the average home kitchen: they never use one ingredient when three will do, nor do they shy away from expensive options like foie gras, truffles and abalone. Even simple-sounding dishes like Chiles Rellenos are accented with complicated sauces and garnishes. It's hard to imagine anyone consulting this book to whip up dinner, but it's easy to see how a Top Chef obsessive would get much satisfaction out of it, if not necessarily a full stomach.


Book Details

Hardcover: 256 pages
Publisher: Chronicle Books (March 20, 2008)
Language: English
ISBN-10: 0811864308
ISBN-13: 978-0811865784
Product Dimensions: 10.3 x 8.6 x 1.1 inches

Top Chef The Cookbook

Wednesday, June 3, 2009

Chinese Cooking Tips From Eileen Yin-Fei Lo

According to Wikipedia;
Eileen Yin-Fei Lo, educator, chef and author of eleven cookbooks on Chinese cuisine, was born in Sun Tak, a suburb of Canton, China. She began to cook at the age of five, encouraged by her parents, she had a mother who believed that “children should know how to do everything,” and a father who had traveled widely and was familiar with foreign cuisines. These early influences included a grandmother who instilled in her the techniques and culture of cooking while she was still a child.


The Chinese Chicken Cookbook:
100 Easy-to-Prepare, Authentic Recipes
for the American Table
The Chinese Chicken Cookbook: 100 Easy-to-Prepare, Authentic Recipes for the American Table (Hardcover) by Eileen Yin-Fei Lo (Author), San Yan Wong (Illustrator)


Eileen Yin-Fei Lo @Amazon.com

Thursday, May 28, 2009


HOT WATER CORNBREAD

1 c. white cornmeal1 c. yellow cornmeal1 tsp. salt
Mix thoroughly and pour in 2 cups of boiling water containing 2 tablespoons of shortening. This produces a firm mound of dough. Set the dough aside and let it cool for approximately 20 minutes.
After the dough is cool, work in 1/2 teaspoon of baking powder dissolved in 2 tablespoons of hot water. Pinch off a piece of dough and pat into small round cakes. You may either fry the cakes immediately or refrigerate on wax paper for later cooking.
Fry in deep fat hot enough to bubble freely over the cornbread. This cornbread should have a crisp crust on the outside, yet be soft on the inside.

Thursday, April 16, 2009


Banh Mi

I cannot say it any better! Please visit this site I discovered called the Battle of the Banh Mi. I had one today. I have not had one in ages, it was so good and was dripping down my chin. So I had to post some info on this most delious sandwich from the "Battle of the Banh Mi"

Vietnamese baguette sandwiches, called Banh Mi, have attracted a loyal fan base like never before. Like a musical band with rock star status, these sandwiches have an almost cult-like following of epicurean devotees. The uniqueness of these sandwiches not only lies within the french influenced baguette, but it’s also the flavor packed, savory Viet fillings that what makes the marriage of the two main ingredients a true love affair.
It starts with a Viet style french baguette; usually made with a combination of rice and/or wheat flour, resulting in a very light, crackly crust and not overly dense bread. The majority of Viet bakeries strive & compete to achieve a golden, crackly crust with just a touch of center, where most of the baguette is more crust than center. A few other may be content on creating a Viet baguette that is a little more soft and chewy on the outside, and a little more “hoagie” like. So there is a bread for almost everyone.
Inside the length of the cut baguette or (occasionally a full demi-baguette), a great banh mi should have luscious, Viet flavored fillings such as pork prepared in numerous ways; juicy pork meat ball (xiu mai), bar-b-que (thit nuong), shredded (bi) and pork roll (cha lua).
Cold cut combinations (pork roll, ham, and/or head cheese), grilled chicken (ga nuong), sardine (ca moi), scrambled egg (trung chien) and vegetarian (chay) are just a sampling of the plethora of possibilities one may be offered on the menu.
Other common ingredients used to finish the sandwich often are: liver pate, homemade mayo, touch of soy sauce, shredded pickled carrots & daikon, fresh cilantro, jalapeño heat and crispy cucumber slices. Most any of these condiments may be omitted since, banh mi are nearly always made to order.
To top off that banh mi high”, they are still “light” on the pocketbook. Rock on!
(more…)

Tuesday, March 31, 2009

Was thinking about where to add Star Anise rather than Cookies and found this.


Daube of beef with orange & star anise


The perfect supper for those rainy nights spent in with a good bottle of red and an open fire blazing

Recipe by Mary Cadogan


Serves 8

Prep 45 mins
Cook 3 hrs to 4 hrs
2kg. Stewing Beef
300g. Shallots
1 Orange
A good bunch of Parsley and Thyme
3 T. Olive Oil
25g. Butter
200g. Lardons (Will have to find out what this is - well now I know: small pieces of pork fat)
4T. Cognacc
1 T. Flour
2 Carrots thinly sliced and 3 finely chopped
2 Celery stalks
1and 1/2 cups Red Bordeaux
2 star anise
4 cloves of Garlic


Heat oven to 160C/fan 140C/gas 4. Wash and dry the meat. Pour boiling water over the shallots to cover them, leave for 5 mins, then drain, peel and cut in half. Put to one side. Pare long strips of peel from half the orange and tie together with the parsley and thyme with some string.
Heat 2 tbsp of the oil and the butter in a large heatproof casserole. Add the meat and half the lardons and brown quickly on all sides (you will need to do this in batches). Return all the meat to the pan, then quickly pour over the Cognac and ignite. Stand well back when you do this as the flames may be fierce. Stir the flour into the meat until the flour disappears.
In a separate pan, fry the onion, finely chopped carrot and celery in 1 tbsp of oil until softened; this should take about 5 mins. Add to the casserole pan along with the wine, herb bundle, star anise, garlic, salt and pepper. Bring to the boil, stir well, then cover tightly and cook in the oven for 2 hrs.
Tip the remaining lardons into a frying pan and heat with a drop of oil until the fat runs, then add the shallots and fry gently until they are lightly coloured. Add to the daube along with the sliced carrots, give it a stir and cover again. Return to the oven for a further 1½-2 hrs, until the meat is very tender. Taste and adjust the seasoning if necessary. Remove the herb bundle (and, if you can find them, the star anise) and serve with the two side dishes. If you're making the daube ahead of time, reheat it either on the hob or in the oven for 20-30 mins. The daube also freezes well for up to 1 month.

Wednesday, March 25, 2009

I LOVE lOVE LIVER
CHICKEN LIVER WITH FRENCH BREAD TOASTS


Ingredients
325g unsalted butter, melted and cooled slightly, plus a little extra for greasing
500g chickens’ liver, trimmed
1 garlic clove, crushed
2 tbsp brandy
Tiny pinch each of ground nutmeg, cloves,
cinnamon and allspice
1 baguette, sliced and toasted, to serve

Method
1. Preheat the oven to 110_C/fan90_C/gas 1/4. Grease 8 x 100ml ramekins with melted butter, then set aside.
2. Put the liver, garlic, brandy and spices into a food processor. Season with white pepper and 1 teaspoon salt and blend for 1 minute. With the machine still running, add 225g melted butter and blend for a few seconds. Press through a fine sieve into a bowl.
3. Divide the mixture among the ramekins and cover with buttered foil. Put in a small roasting tin and pour in hot water to come halfway up the sides of the ramekins. Cook for 45 minutes or until just set. Remove from the tin and cool. Remove the foil and cover each ramekin with cling film. Chill overnight.
4. Slowly melt the remaining butter in a small pan. Remove from the heat, set aside for 10 minutes, then pour away the clear butter, leaving just the sediment. Pour a thin film over each parfait and chill until set. Serve with the toast and some onion marmalade.

Wine Recommendation
Wine note: a luscious pudding wine, well-chilled. Try Sauternes or a good value option, Monbazillac.

Who Still eats Cream of Wheat? I Do!


And the leftover cream of wheat is fried the next day.

And now for that Kohlrabi Recipe
Have you ever eaten a kohlrabi? These little sputnik-shaped vegetables come in green or purple, can be eaten raw or cooked, and taste a lot like broccoli stems. The word kohlrabi is German for cabbage turnip (kohl as in cole-slaw, and rübe for turnip) though kohlrabi is more related to cabbage and cauliflower than to root vegetables.


Kohlrabi Ham Bake Recipe

Ingredients
3 Tbsp butter
4 kohlrabi, peeled and diced
8 ounces thick ham, diced
2 Tbsp fresh chopped parsley
3 egg yolks
1 cup heavy cream
2 Tbsp all-purpose flour
Pinch of mace (can substitute ground nutmeg)
Salt and freshly ground black pepper
Method
1 Preheat oven to 350°F. In a large skillet, melt the butter on medium heat. Add the diced kohlrabi and gently cook for 8 to 10 minutes.
2 Beat the egg yolk, and whisk in the heavy cream, flour, mace, salt and pepper until well combined.
3 Place half of the cooked kohlrabi on the bottom of an oven-proof casserole dish. Layer on the diced ham and parsley. Top with the remaining kohlrabi. Pour the sauce ingredients over the kohlrabi and ham.
4 Bake for 30-35 minutes or until lightly browned on top. Serve immediately.
Serves 4.
From Elsie on Simply Recipes


Potatoe, Fennel, Leek Gratin


So here is a recipe using Leeks
From
channelchow.blogspot.com
by Kira ryder


One might imagine with the holidays behind us that the concept of "eating light" would kick in. Oh well. On our way to Rainbow Bridge this evening I suggest Potato Gratin and Eric said, "Yes. That is What I Want."

1. Heat the Oven to 375.
2. Cut a piece of garlic in half and smear all the sides of a 9x12 baking dish.
3. In a heavy bottomed pan (like a Creuset Dutch oven) pour in a quart of milk. (If you are trying to gain weight, make it a half n half creme to milk mixture).
4. Peal and thinly slice a lot of your favorite potatoes. Tonight we used the Yellow Finnish ones they had a Rainbow. I think i peeled and sliced about 9 or so. Add to the milk as you go cuz peeled and sliced potatoes do not respond well to open air.
5. Thinly Slice 2 large leeks and wash. Drain and add to milk mixture.
6. Thinly slice 3 cloves garlic and add to milk mixture.
7. Tonight I added 2 bay leaves, some dried thyme (fresh sprigs is also great), freshly ground nutmeg, white pepper (did not feel like grinding fresh so added already ground), and lots of freshly ground black pepper. I think this is a pretty standard offering. Obviously there is room for experimentation.
8. I start the heat at medium under the milk and potato mixture. I was busy blogging about class today and my latest discovery of my own depression and I did not want to watch the milk come to a boil. So I set the timer for about 15 minutes and came back to check every so often. In general, you want to bring the mixture to a boil slowly and then turn down and simmer until the potatoes become soft, but not to the point of falling apart.
9. Slice up a big bulb of fennel as thinly as possible. Once milk has come to boil and you are simmering it, add fennel.
10. Grate the block of Gruyere that you can get at Rainbow. Seems like a shy 2 cups but I did not measure.
11.. When ready, use a slotted spoon to bring some of the potato mixture into the gratin dish. Sprinkle with some cheese, some ground black pepper and a little freshly grated nutmeg. Layer some more potato mixture and repeat. Layer the last layer and add enough of the milk to come up to the edge of the top potatoes. Cover with remaining cheese and dot with butter. (Clearly there was no resolution to lose weight!)
12. Put in oven and set timer to 45 minutes. Check on gratin. You want a nice toasty brown crust and not too much bubbling. When done, remove and make a simple sharp green salad to cut it.
13. Tonight I made a dressing with garlic, shallots, Serrano, Meyer lemon rind, Meyer lemon juice, country mustard and olive oil. The Salad was Butter Lettuce with cilantro and celery. (Fridge Review, baby).


WHAT IS BROWNED BUTTER?
I like the way "Baking Bites" puts it best.
There is still alot of people out there that do not know the difference between melted butter and browned butter.
Browned butter is pretty much what it sounds like: butter that has been cooked until it is brown. The slightly more formal name for this is “beurre noisette,” or hazelnut butter - a double reference to the light brown color of the cooked butter and the lovely nutty flavor that it acquires during the cooking process.
If you’ve ever cooked with butter, using it to grease a frying pan before cooking eggs, for instance, you probably know that it is very easy to burn butter. The milk solids in butter have a low smoking point compared to pure fat, which means that while oil and shortening can take very high heats and be stable, butter cannot. But their ability to take the heat also precludes them from being able to achieve the browning that butter can. The browning of beurre noisette is a result of the milk solids in the butter cooking, toasting, and taking on a deep flavor and brown color. It doesn’t take long to go from brown to black (beurre noir), so stand by the stove while you’re cooking.
To make browned butter, simply melt some butter (I prefer unsalted for this) in a small saucepan on the stove. Continue cooking it on medium-high heat until the butter boils and begins to brown. Don’t worry if your butter bubbles or foams; just keep cooking it. When the butter begins to brown, you will see specks of darker brown develop at the bottom of the pan. Stir these up and cook until the butter has a nice and even dark honey color. Remove from heat and transfer to another container to cool.
Browned butter can be used in baking in place of regular melted butter and is a great way to finish off a simple vegetable or pasta dish and really kick up the other flavors.

Wednesday, March 11, 2009


YET ANOTHER CHILDHOOD FOOD
YES I HAD CREPES GROWING UP AS A CHILD BOTH SWEET AND SAVORY.
SOMETIMES SPREAD WITH RASPBERRY JAM, ROLLED AND LIGHTLY DUSTED WITH ICING SUGAR OR FILLED WITH CALIFLOWER IN A WHITE SAUCE WITH A HINT OF NUTMEG.


LEEKS AND KOHLRABI

MY MOM SERVED THESE WHEN I WAS A CHILD AND I WILL POST THE RECIPES AS SOON AS MOM IS FEELING BETTER, AS I WANT TO TRY THESE AGAIN. I DO REMEMBER ONE WAS IN A WHITE SAUCE. DOES ANY ONE ELSE HAVE ANY SUGGESTIONS/RECIPES?
What Are Leeks?
Leeks look more or less like a giant scallion, and in some ways that’s exactly what they are. They are part of the genus Allium, which you may remember from such foods as onions, garlic, and scallions. The white and light green portions are normally the parts that people eat, and they have a mild onion flavor that is slightly sweet - much less harsh than a normal onion. The dark green leaves can be used in stocks or soups for flavor.
Leeks can be grown in fairly cold temperatures. It is interesting that in order to get a longer white base (the delicious part), farmers will stack dirt around the plant as it grows, keeping more of it from sunlight. As a plant with many layers, this means that dirt gets deep inside the plant, so it needs to be washed well.
What Should I Look For?
When buying leeks, look for ones with large, white bases. They should not be slimy, dried out, or browning. Just store them in loosely wrapped plastic in the refrigerator and they should last for a couple weeks.
What are Kohlrabi
When is a root vegetable not a root vegetable? When it's a small bulbous member of the cabbage family called kohlrabi, that's when. For all intents and purposes, kohlrabi appears to be a root vegetable in the same company as turnips, radishes and rutabagas. However, the bulbous shape of kohlrabi is caused by a swelling of the plant's stem near the ground. In that sense, kohlrabi is more of a tightly packed version of its cousin, cabbage. In fact, the name kohlrabi is derived from two German words: kohl meaning cabbage and rabi meaning turnip. It is not unusual to hear the term "turnip cabbage" to describe kohlrabi.
Despite its connections to cabbage and turnips, steamed or boiled kohlrabi is said to taste more like broccoli or Brussels sprouts. Indeed, kohlrabi is in the same general category, the Brassica oleracea Gongylodes group, as the broccoli it resembles in flavor. It can also be used in lieu of cabbage in many of the sausage and cabbage dishes favored in German cooking.
A raw kohlrabi can also be eaten like an apple, although it contains far less sugar. Some people find the taste of raw kohlrabi to be an acquired one, but many people who were raised in largely German communities in the Midwest grew up eating kohlrabi whenever it was in season. One town in Illinois even held annual festivals in honor of the kohlrabi, but such enthusiasm for the vegetable has waned somewhat in recent years.
There are certain things to consider when shopping for kohlrabi. Kohlrabi is not always available in the produce section of many grocery stores. It it very seasonal, and low consumer demand often keeps it off the truck for long-distance deliveries. The best kohlrabi is usually found in farmers' markets or locally owned produce stores.
Ideally, a kohlrabi bulb should be about the size of an apple or smaller, approximate 3 inches in diameter. Anything larger could have noticeably less flavor or woody sections. Kohlrabi may look like a root vegetable, but it should be displayed separately from true root vegetables such as turnips or rutabagas. Kohlrabi plants have a distinctive leafy stalk protruding from the top of the swollen stem. This stem is usually removed before chopping the actual kohlrabi bulb for steaming or boiling in salted water.

I LOVES MY SPINACH ------ SOMETHING NEW TO TRY


Amaretto liqueur lends almond flavor to a red wine bacon vinaigrette dressing for fresh or wilted spinach salad. It is quite easy to make and is packed with flavor.
Prep Time: 10 minutes
Cook Time: 15 minutes
Ingredients:
2 pounds spinach (4 bunches)
1 pound bacon, diced
1/2 cup salad oil
2 large cloves garlic, crushed
1/2 cup red wine vinegar
1/2 cup lemon juice
4 teaspoons Worcestershire sauce
1 teaspoon dry mustard
1/4 cup Disaronno® Originale Amaretto
Salt and pepper to taste
1/4 pound mushrooms, sliced
1 small red onion, sliced
Preparation:Wash spinach. Remove large stems and tear into bite-size pieces. Store in plastic bags in refrigerator until ready to use. To make dressing:Place bacon in a large skillet. Cook over moderate heat, stirring occasionally, until bacon is crisp and all fat is rendered. Remove bacon, reserve 1/8 cup bacon fat, discard rest. Return bacon fat to skillet and add oil, garlic, wine vinegar, lemon juice, Worcestershire sauce, mustard, Amaretto, salt, and pepper. Simmer until blended. When ready to serve, place spinach, mushrooms, red onion, and reserved bacon in large salad bowl. If you like a wilted salad, pour the dressing over very hot; if not, let cool a bit before serving; toss well. Yield: 8 servings Recipe Source: DiSaronno® Originale Amaretto
STUFFED PEPPERS

INGREDIENTS
1 pound ground beef
1/2 cup uncooked long grain white rice
1 cup water
6 green bell peppers
2 (8 ounce) cans tomato sauce
1 tablespoon Worcestershire sauce
1/4 teaspoon garlic powder
1/4 teaspoon onion powder
salt and pepper to taste
1 teaspoon Italian seasoning

DIRECTIONS
Preheat oven to 350 degrees F (175 degrees C).
Place the rice and water in a saucepan, and bring to a boil. Reduce heat, cover, and cook 20 minutes. In a skillet over medium heat, cook the beef until evenly browned.
Remove and discard the tops, seeds, and membranes of the bell peppers. Arrange peppers in a baking dish with the hollowed sides facing upward. (Slice the bottoms of the peppers if necessary so that they will stand upright.)
In a bowl, mix the browned beef, cooked rice, 1 can tomato sauce, Worcestershire sauce, garlic powder, onion powder, salt, and pepper. Spoon an equal amount of the mixture into each hollowed pepper. Mix the remaining tomato sauce and Italian seasoning in a bowl, and pour over the stuffed peppers.
Bake 1 hour in the preheated oven, basting with sauce every 15 minutes, until the peppers are tender.

Friday, March 6, 2009

I HAVE A CRAVING FOR SOUP

Could be the weather - Winter just won't let go and let Spring.

I could have more than one Bowl of this.


Image from annieseats.wordpress.com- check out her site also

Italian Wedding SoupIngredients:For the meatballs:3/4 lb. ground chicken1/2 lb. Italian sausage2/3 cup fresh white bread crumbs2 tsp. minced garlic3 tbsp. chopped fresh parsley1/4 cup grated Romano cheese1/4 cup grated Parmesan cheese3 tbsp. milk1 egg, lightly beatenKosher salt and black pepper
For the soup:2 tbsp. olive oil1 cup minced yellow onion1 cup 1/4-inch diced carrots3/4 cup 1/4-inch diced celery8 cups reduced-sodium chicken broth1/2 cup dry white wine1 cup small pasta (I used ditalini)1/4 cup minced fresh dill7 oz. baby spinach, washed and trimmed
Directions:Preheat the oven to 350 degrees F. Line a sheet pan with parchment paper.
For the meatballs, place the ground chicken, Italian sausage, bread crumbs, garlic, parsley, Romano cheese, Parmesan cheese, milk, egg, 1 teaspoon salt, and 1/2 teaspoon black pepper in a bowl. Mix gently with a fork until well combined. Form the mixture into 1- to 1 1/4-inch meatballs and place onto the prepared baking sheet. Bake for 30 minutes, until cooked through and lightly browned. Set aside.
In the meantime, for the soup, heat the olive oil over medium heat in a large Dutch oven. Add the onion, carrots, and celery and saute until softened, 5-6 minutes. Add the chicken broth and wine and bring to a boil. Add the pasta to the simmering broth and cook for 6-8 minutes or until al dente. Add the fresh dill and then the meatballs to the soup and simmer for 1 additional minute. Taste for seasoning, and adjust salt and pepper as necessary. Stir in the fresh spinach and cook for 1 minute, until the spinach is just wilted. Ladle into soup bowls and sprinkle with Parmesan cheese, if desired.
Source: adapted from Barefoot Contessa: Back to Basics by Ina Garten

Monday, March 2, 2009

Italian Food With Rick Steves

I have some friends, a husband, wife and kids, who are a military family, and they recently just returned from a tour of duty in Italy. They have taken me out to eat Italian food and kind of given me an overview of what it was like to live in Italy. I love talking about food with them, the husband and I went to college together, down in Texas. So over the years we have went out to eat at many different places and shared ideas on all types of food.

I was really interested in hearing the radio show "Travel with Rick Steves." According to their website;
is a fun, hour-long, and practical talk show with guest experts and calls and questions from travelers. This weekly program is a lively conversation between travelers and the experts as we learn to explore our world smartly, smoothly, and thoughtfully.
This week he had several guest that discussed Italian food.

The February, 28 show is titled, Everyday Italian Cuisine. It was a discussion of Italy's distinctive regional cuisines. And how food is a high point for many travelers. They also covered the distinctive customs that Italians have for their food and drink and how it sometimes baffles American visitors.

Two Italian food guides talked with Rick to explain the basics of good everyday Italian style food. I also really enjoyed the calls form listeners, they made many great points about Italy, the food and the people.

I wanted to pass this link on to my friends and also share it with those who read our blog. You can listen to the show here >>> Traveling on your stomach: Everyday Italian Cuisine Windows Media Player.

Links to Italian Food Guides;

LemonsAndOregano.com
Tommaso's website

Monday, February 23, 2009

Now for Something plain and simple it needs no recipe.


Chili Lime Mango Slices

I love my Mango , but I am willing to try this.
Black Forest Gateau

Heston Blumenthal's Way

(A small note by Mochacoffee: I fell in love with this when I found it last year. The recipe may seem dauting and it does read like a book, but just look at those ingredients and tell me you would love a taste of this. I would love to try this, but I would have to read the recipe over and over again to visualize it in my head first. but I love challenges. Maybe for my 60th Birthday?)


I know what you're thinking. But bear with me. The key components of this German confection - chocolate, cherries and cream - are a sublime combination. My version is made up of six layers, most of which will work as desserts in their own right. Do have a go at the whole thing, though - you'll never think of the gateau the same way again.
I’m not sure why the black forest gateau of my childhood was never as good as it should have been. After all, chocolate, cherries and cream are three ingredients that go together well. However, leaden cream, dry sponge and cheap cooking chocolate conspired to make it cloying and virtually inedible, an utterly ersatz experience. I would try to pick the chocolate off the top, and even that would be disappointing. I’m not alone in this. I’ve come across almost nobody who harbours good memories of black forest gateau. So who ordered it and, more to the point, why? Did our parents really like it? Of course, it looked exotic. It offered the promise of luxury and indulgence, which is probably why it became part of a very British idea of the special occasion — an Abigail’s Party version of posh. Persuading people that it’s actually a perfect dessert was going to be a challenge. But I like a challenge. No food need be beneath contempt, and I wanted to prove that black forest gateau doesn’t have to be middle-brow. The liquid bitterness of the cherries complementing powerfully dark chocolate; the smooth mousse, rich cream and light sponge giving a lovely variety of textures; the touch of alcohol providing a lively surprise — do it right, and it becomes something wonderful. It's Gateau fabulous Although the Schwarzwälder Kirschtorte was created less than 100 years ago, its history is as impenetrable as parts of the Black Forest itself. Some say that it’s a tribute to the kirsch that plays such an important role in the cake’s distinctive flavour and is made in some 14,000 distilleries in the region. Whatever its origins, the first recipe appeared in 1934, and it has gone on to become the bestselling cake in Germany. To discover how a torte ought to taste, I ventured into the Black Forest. What better place to have a Konditorei, that excellent German combination of cake shop and cafe? The Café König opened in Baden-Baden 250 years ago and is still going strong. If any place was going to come up with a worthwhile slice of torte, surely this was it. In truth, I was slightly nervous about what I was going to eat. What if it was as disappointing as I remembered? The König’s gateau was a tall, sharp wedge crowned with chocolate flakes and a rounded hillock of cream topped with a cherry half. Beneath this, at least six layers of light and dark alternated. It wasn’t a cake so much as an architectural creation. The cream was rich, the mousse powerful but delicate; the kirsch had the sweet sharpness of a well-balanced spirit rather than the mule kick of a cheap one. The frozen cherries had an abundance of malic acid (an acid found in many fruits, especially apples: think of biting into a granny smith), which provided a perfect counterbalance to the fat of the cream. The chocolate had a cherry note that went well with the other flavours. All of it rested on a classic biscuit base. Although the true Schwarzwälder Kirschtorte was very different from the Great British gateau, I could see how one had gradually been transformed (and traduced) into the other. I was looking forward to fooling around with the torte’s complex architecture, and I could see ways in which I might still be able to summon up — in a pleasant form — some of the nostalgia surrounding the humble, misconstrued gateau. Combining the two would make a cake that was really special.


The recipesMakes 3 cakes, each to serve 4-6 Here it is — a black forest gateau, composed of six delicious layers: a madeleine biscuit base, topped with aerated chocolate, chocolate sponge, kirsch cream, chocolate ganache and chocolate mousse. One of the beauties of this recipe is its adaptability. The layers don’t have to be assembled into a cake: many can be served up as desserts in their own right. Kids and grown-ups alike will love the chocolate mousse and aerated chocolate. Serving kirsch cream with a bowl of cherries would be an interesting echo of the cake’s origins. This really is six recipes in one — and the possibilities are almost endless. More than any other dish, perhaps, this one can be let down by its ingredients.

The salt plays a pivotal role, enhancing the flavours and tempering the cake’s sweetness. And it is absolutely vital that you use the best chocolate, sour cherries and kirsch that you can get. The kirsch is especially important: I recommend Franz Fies, but if you can’t obtain that, look for one that is smooth, aromatic and full-flavoured. As this recipe makes three cakes, you can either freeze the cakes you don’t want to use at once, or make up one cake and save the rest of the prepared ingredients.

Special equipment
21.5cm x 31.5cm brownie tin(s), food mixer (optional), oven thermometer, 2.6-litre hard plastic container with lid (through which you have bored a small hole, using a corkscrew), microwave (if you have one), whipping-cream canister and charges (from
www.creamsupplies.co.uk), vacuum-seal storage bag with one-way valve, vacuum cleaner, digital probe, 9cm x 19cm x 5cm-deep baking tin(s), piping bag, melon- baller, large cardboard box, paint gunTiming

Lots of layers mean lots of different cooking techniques. To assemble a whole cake in one day would, undeniably, be a fair amount of work. Better to think of this as architecture — a flat-pack gateau — and spread out the building tasks. Prepare the chocolate sponge and kirsch cream up to a month in advance and keep them in the freezer, and make the biscuit base up to a week in advance, keeping it in an airtight container. The aerated chocolate can be prepared any time: it will keep well in the fridge if sealed properly. That leaves only two layers to prepare on the day: the chocolate ganache and the chocolate mousse — neither of which is particularly laborious.

Madeleine biscuit base

50g unsalted butter 1 large egg (60g)30g honey 60g plain flour30g icing sugar, siftedtsp (5g) baking powder Pinch of table salt1 tbsp (15ml) whole milk 1 Heat the oven to 200C/400F/Gas Mark 6. Line a 21.5cm x 31.5cm brownie tin with greaseproof paper or a little butter. 2 Melt the butter over a low heat, then leave to cool a little. 3 In a separate bowl, beat the egg and honey together for 5 minutes, or until white and thick. A food mixer with a paddle attachment is ideal for this job. 4 Gradually add all the dry ingredients, then the cooled butter and finally the milk. Mix until they are just combined. Do not overbeat. 5 Pour the mixture into the brownie tin. Bake for 10 minutes, or until a pale golden brown. 6 Turn the oven down to 100C/200F/Gas Mark . Use an oven thermometer to check this. Cut the biscuit base into three 8cm x 18cm rectangles. It’s not essential to be exact — they will need to be trimmed again when assembling the gateau. Lift them out of the tin and place on a baking tray. 7 Bake in the low oven for 20 minutes, until deep golden brown and crisp. Leave to cool, then store in an airtight container.

Aerated chocolate layer

Here, it is a good idea to get all the equipment ready beforehand, so that the chocolate goes through the process quickly, stays liquid and gets well aerated.
500g top-quality milk chocolate (such as Valrhona’s Tanariva)65g groundnut oil

1 Line the 2.6-litre plastic container with greaseproof paper.
2 Break the chocolate into chunks and place in a medium-sized glass bowl. Place the bowl over a saucepan of simmering water and let the chocolate melt. (The bowl needs to be large enough so it can sit on top of the saucepan without its base touching the water: the aim is to soften the chocolate on the gentlest of heats, so it doesn’t go grainy.) Alternatively, melt the chocolate at high power in a microwave for 1–2 minutes. Again, be careful not to overheat it.
3 Place a whipping-cream canister in a bowl or pan of boiling water. (Warming the canister ensures that the chocolate stays molten when poured into it.)
4 Stir the oil into the bowl containing the melted chocolate, then pour it all into the whipping-cream canister. Attach the canister cap, and charge with three charges.
5 Shake the canister, then squirt the chocolate onto the base of the 2.6-litre plastic container. Put on the lid, then place the container in the vacuum storage bag. Position the storage bag’s valve over the hole in the container’s lid. Switch on the vacuum cleaner and place the hose on the valve to suck the air out of the bag. The chocolate should rise and be riddled with small bubbles. As soon as it does so, remove the vacuum and close the valve as quickly as possible. To set the chocolate, place the box — still in the vacuum bag — in the fridge until required.

Flourless chocolate sponge

65g top-quality dark chocolate (such as Amedei’s Toscano Black 66%)7 egg yolks (140g)130g unrefined caster sugar 15g good-quality cocoa powder (such as Green & Black’s Organic), sifted 5 egg whites (150g)

1 Preheat the oven to 180C/350F/Gas Mark 4. Line a 21.5cm x 31.5cm brownie tin with greaseproof paper or a little butter.
2 Break the chocolate into chunks and place in a glass bowl. Place the bowl over a saucepan of simmering water and let the chocolate melt (or heat the chocolate at high power in a microwave for 1–2 minutes). Leave to cool.
3 Beat the egg yolks with 65g of the caster sugar for 5 minutes, or until white and thick. (A food mixer with a whisk attachment can perform this task.) Stir in the cocoa powder and the melted, cooled chocolate.
4 Whisk the egg whites with the remaining sugar in a separate bowl until soft peaks form. (The mixer can do this job too. If you have only one mixer bowl, a similarly sized glass or stainless steel bowl will work. Make sure it is spotlessly clean: a dirty bowl is the most common reason for egg whites not stiffening.)
5 Gradually fold the egg whites into the egg-yolk mixture, then pour this mixture into the brownie tin and bake for 20–25 minutes. The surface of the cake will look a little dry when removed from the oven, and it may sink slightly. Leave it to cool before cutting into three 8cm x 18cm rectangles.

Kirsch cream

2 sheets of leaf gelatin 5 egg yolks (100g)90g unrefined caster sugar 250ml whole milk 220ml whipping cream 20ml top-quality kirsch
1 Line a 21.5cm x 31.5cm brownie tin with clingfilm.
2 Place the sheets of gelatin in a small bowl and pour over 100ml cold water. Leave for 15 minutes, until soft.
3 Beat the egg yolks with the sugar for 5 minutes, or until white and thick. (The food mixer can do this job.)
4 Gently warm the milk in a small pan. Remove from the heat and stir in the beaten egg-yolk mixture. Return to a medium heat and cook for a further 2–3 minutes, stirring frequently. Use a digital probe to monitor when the temperature of the mixture reaches 80C/175F, at which point it should be taken off the heat. (It will have become thicker, with tiny bubbles appearing on the surface.)
5 Drain the gelatin and stir it into the warm mixture. (Make sure the mixture is not too hot, or the gelatin will break. Make sure, too, that all the gelatin dissolves.) Leave until lukewarm.
6 Meanwhile, lightly whip the cream, then add the kirsch. Fold this into the cooled gelatin mixture, then pour the mixture into the brownie tin and place it in the freezer to set for at least 1 hour.

About Kirsch

Good kirsch is integral to this recipe, and the quality of the spirit is very important. Here are some pointers:
- It musn’t be too sweet. - I like to use one with 50% alcohol — strong enough to stand up to the chocolate. - Look for a brand that is aromatic and flavoursome. I recommend Franz Fies. - Selfridges’ wine department has a very good spirits range, as does Fortnum & Mason, from which you can also buy online at
www.fortnumandmason.com.

Cherry stalks

To make the cherry “stalks”, you need six plump vanilla pods. Cut them into four lengthways, tie a knot at the end of each strip, then twist it to give a gnarled effect. Place on a plate and leave to dry overnight at room temperature.

You’ve made the biscuit base, the chocolate sponge, the kirsch cream and the decorative stalks for the cherries. Now you need to make the remaining two recipes and assemble the gateau.
You’ll also need the following for the final touches. 1 jar of apricot baking glaze 1 jar of top-quality wild cherries in heavy syrup (eg Griottines, or Amarena Fabbri if you can get them) 30ml top-quality kirsch (eg Franz Fies)500g top-quality dark chocolate (such as Amedei’s Toscano Black 66%) 150g groundnut oil Line a 5cm-deep, 9cm x 19cm loaf tin with clingfilm.

Now make the chocolate ganache.

Chocolate ganache

95ml whipping cream 1 tsp glucose syrupPinch of table salt95g top-quality dark chocolate (such as Amedei’s Porcelana) 20g unsalted butter, diced
1 Gently heat the cream, glucose syrup and salt. Break the chocolate into a bowl, then stir in the warm cream. When the chocolate has melted entirely, add the butter and stir until that too has melted. Spoon the mixture into a piping bag and place it in the fridge for at least an hour to firm up.
2 Meanwhile, if need be, trim the madeleine base so that it will fit the bottom of the loaf tin, with a 5mm gap between it and the sides of the tin. Trim the flourless chocolate sponge to the same dimensions as the madeleine base. Cut the aerated chocolate to these dimensions, and trim it so that it is no more than 1cm thick.
3 Before putting the madeleine base into the tin, spread it with a generous layer of apricot baking glaze. Put the aerated chocolate on top and place these in the bottom of the tin.
4 Remove the piping bag containing the ganache from the fridge. Along the length of the top of the aerated chocolate, about 2–3mm from the edge, pipe a thick line of ganache. Repeat on the other side. (Looked at from above, the rectangle of aerated chocolate should now have two stripes of ganache, each running parallel to the longer edges.)
5 Drain the cherries and reserve the syrup. Fill the gap between the two lines of ganache with a double row of cherries. (The idea is that every person is served a slice containing a pair of cherries, so calculate the number you’ll need accordingly and be sure to space them well. Keep in mind roughly where you’ve placed them — you’ll need to know later.)
6 Mix 60ml of the reserved cherry syrup with the kirsch. Dip the chocolate sponge in this soaking syrup, then position it on top of the ganache and cherries.
7 Remove the kirsch cream from the freezer and trim it to the same dimensions as the other layers. Manoeuvre it on top of the chocolate sponge, using a palette knife or fish slice.

Put the gateau in the freezer while you prepare the chocolate mousse.

Chocolate mousse
4 egg yolks (80g)200g unrefined caster sugar 100ml whole milk150g top-quality dark chocolate (such as Amedei’s Chuao) Generous pinch of table salt 200ml whipping cream
1 Beat the egg yolks with the sugar for 5 minutes, until white and thick. (A food mixer with a paddle attachment can be used for this.)
2 Gently warm the milk in a small pan. Remove it from the heat and stir in the beaten egg yolks. Return to a medium heat and cook for 2–3 minutes, stirring frequently. Use a digital probe to monitor when the temperature of the mixture reaches 80C/175F, then remove from the heat.
3 Finely chop the chocolate and place it in a medium-sized bowl. Pour the warm milk and eggs over the chocolate and stir until the chocolate has melted. Add the salt and leave to cool.
4 Whip the cream until soft peaks form. Fold the cream into the cooled chocolate mixture.

5 Remove the gateau from the freezer. Make sure the clingfilm is taut against the sides of the tin. Pour the chocolate mousse down the sides of the tin until it reaches a level 1cm above the kirsch cream layer. Return the gateau to the freezer and leave it for at least an hour, to firm up the layer of mousse.

6 Using a melon-baller, scoop out a double row of indentations along the gateau. (Ideally, they should be above the cherries that were added earlier.) Return the gateau to the freezer for a least an hour: it needs to be properly frozen in order to get the right effect with the chocolate coating.

7 For the coating, break the chocolate into chunks and place in a small glass bowl. Melt the chocolate by placing the bowl over a pan of simmering water, or by heating it at high power in a microwave for about 2 minutes. Leave to cool slightly before stirring in the groundnut oil. (If you don’t plan to coat the cake with the paint gun, take 100g of this chocolate, cut it into shavings and scatter over the cake just before serving.)

8 Fill the base of the paint gun with the melted chocolate mixture and attach the nozzle. To avoid redecorating the kitchen in chocolate brown, set the large cardboard box on its side (which effectively provides a protective roof and walls to work in). Remove the gateau from the freezer. Carefully lift it out of the loaf tin and onto a plate. Remove the clingfilm and place the gateau in the cardboard box. Spray the gateau with the chocolate, turning carefully as you go. Return it to the freezer until 20 minutes before serving.

9 Use a skewer to bore a small hole 2–3in into the centre of the bottom of each indentation, down towards the cherry below. Agitate the skewer a little to increase the hole’s diameter. Pour in cherry syrup until it reaches the top of the bore-hole (but doesn’t spill out into the indentation itself). Place a sour cherry, stalk end up, in each indentation, and sit a dried vanilla pod in each cherry, to make a decorative stalk. For the full effect, fill an atomiser with kirsch and squirt it round the room just before serving the gateau — it will magically bring a little of the Black Forest to the dinner table.

The perfect chocolate sorbet

Still haven’t had enough chocolate?

Then top up your quota with this. You’ll need an ice-cream maker. Serves 6 500g semi-skimmed milk60g glucose 60g cocoa powder 340g fine 33% milk chocolate, in pieces Place 500ml water in a pan with the milk and glucose. Bring to the boil, add cocoa and simmer for 6 minutes. Remove from the heat, add the chocolate and stir until melted. Pour into a bowl and place it into another, larger bowl of iced water. Allow to cool until the mixture reaches 40C. Pour into the ice-cream machine and churn as per the manufacturer’s instructions.

Extracted and adapted from In Search of Perfection by Heston Blumenthal - Bloomsbury
Ginger Macaroons


One of the few cookies I make year round or used to make as I live on my own now, and I would eat them all if they were there. I have never tried the fresh grated ginger. I also Love Ginger, so I am sure these are delicious.

From Chef-girl.net


3 cups flaked coconut2/3 cup white sugar3 egg whites1 teaspoon freshly grated ginger (or a little bit more if you’re like me, and love the stuff)
Mix all the ingredients together in a large-ish bowl.Drop by teaspoonful onto a lined baking sheet. (I used my Silpat sheet, but parchment paper would work too)Bake for 10-12 minutes at 350ºF or until golden on the edges.
Notes:I found that letting the macaroons cool for a minute or two on the baking sheet makes them much easier to remove.

Monday, February 16, 2009

From the Book The Joy of Cookies by Sharon Tyler Herbst

I make these when I get bored with Banana Bread

West Indies Banana Ginger Cookies

1.)Bowl #1: Combine 2c. Flour, 1 tsp. baking powder, 3/4 tsp. cinnamon, 1/2 tsp. nutmeg, 1/4 tsp. ground cloves and 1/4 tsp. salt.
2.) Bowl # 2: Combine 1/2 c. soft butter, 1.c Sugar, 1and1/2 tsp. vanilla and 2 eggs. Add to dry ingredients.
3.) Then add 1 c. mashed ripe banana, 1/3 c. minced crystallized Ginger and 1/2 c. raisins.

Drop by the teaspoon full onto lightly greased cookie sheets
bake in a preheated oven of 375 for about 6-8 mins.

When a bit cooler dust with icing sugar
I have found these to be a soft cookie almost cake like,but I enjoyed them. I have at times used ground ginger when crystallized ginger was not in my cupboard.


FOR THE LOVE OF MARKET PLACES

I was introduced to open air market places when I lived and worked in Germany I remember going for fresh milk and crusty buns every morning. I remember walking down the crowded isles, seeing all the colours and the smells, everything from herbs and spices to fish. I was introduced to open air markets once again when I went to the Caribbean isle of Grenada (the spice isle) There I fell in love with Mangoes, Breadfruit, Calalou and Okra. I would Love to visit a market place on every continent.

Thursday, February 12, 2009


Mango Ice Cream is My ultimate favorite in the world! Oh Yes !


HOMEMADE MANGO ICE CREAM

4 c. peeled mango slices, chopped fine1 c. sugar4 (13 oz.) cans sweetened milk, chilled1/2 gal. Half and Half6 eggs, well beaten1 tbsp. vanilla extract1 tsp. almond extract
Combine mango slices and sugar in a microwave proof bowl. Heat until sugar dissolves. Place in refrigerator to chill slightly. In a churn, combine sweetened condensed milk, Half and half, eggs and extracts. Add chilled mango mixture. Follow manufacturer's directions for making ice cream.


My Fifth item on my list: Homemade Limoncello
Keep your bottles of limoncello in the freezer until ready to serve. The ingredients are simple and few, and making a batch doesn't require much work, but you'll need some time.
Limoncello must steep for (80) eighty days.


Ingredients
15 lemons* 2 bottles (750 ml) 100-proof vodka** 4 cups sugar 5 cups water * Choose thick-skinned lemons because they are easier to zest.** Use 100-proof vodka, which has less flavor than a lower proof one. Also the high alcohol level will ensure that the limoncello will not turn to ice in the freezer.

PreparationWash the lemons with a vegetable brush and hot water to remove any reside of pesticides or wax; pat the lemons dry. Carefully zest the lemons with a zester or vegetable peeler so there is no white pith on the peel. NOTE: Use only the outer part of the rind. The pith, the white part underneath the rind, is too bitter and would spoil your limoncello. Check out my web page on How to Zest.Step One: In a large glass jar (1-gallon jar), add one bottle of vodka; add the lemon zest as it is zested. Cover the jar and let sit at room temperature for at least (10) ten days and up to (40) days in a cool dark place. The longer it rests, the better the taste will be. (There is no need to stir - all you have to do is wait.) As the limoncello sits, the vodka slowly take on the flavor and rich yellow color of the lemon zest. Step Two: In a large saucepan, combine the sugar and water; cook until thickened, approximately 5 to 7 minutes. Let the syrup cool before adding it to the Limoncello mixture. Add to the Limoncello mixture from Step One. Add the additional bottle of vodka. Allow to rest for another 10 to 40 days. Step Three: After the rest period, strain and bottle: discarding the lemon zest. Keep in the freezer until ready to serve.

My fourth item on my list
from indiaforvisitors

Naan Bread Servings 14 pieces

Ingredients
.25 oz Active Dry Yeast
4 tbsp White Sugar
1 cup Warm Water
1 Beaten Egg
3 tbsp Milk
2 tsp Salt
4 1/2 cup Bread Flour
2 tsp Minced Garlic
1/4 cup Melted Butter

Preparation
In a large bowl, dissolve yeast in warm water. Proof until frothy. Stir in sugar, milk, egg, salt, and enough flour to make a soft dough. Knead for 6 to 8 minutes on a lightly floured surface, or until smooth. Place dough in a well oiled bowl, cover with a damp cloth, and set aside to rise. Let it rise until the dough has doubled in volume.
Punch down dough, and knead in garlic. Pinch off small amounts of dough to make 12 to 14 pieces. Roll into balls, and allow to rise again.
While the dough is rising, preheat grill to high.
At grill side, roll one ball of dough out into a thin circle. Lightly oil grill. Place dough on grill, and cook for 2 to 3 minutes, or until puffy and lightly browned. Brush uncooked side with butter, and turn over. Brush cooked side with butter, and cook until done, another 2 to 4 minutes. Remove from grill, and continue cooking until all the naan has been prepared.
You can lightly sprinkle some more garlic on top for garnish


This is my 3rd item on my list

"pinkpeppercorn.blogspot.com"

I do not go to her site often enough and what a site full of class and such good taste.


pink peppercorn hot chocolate
Winter is a time to be cozy, curl-up and cuddle. It becomes exquisitely delicious and enticing with hot chocolate. It should be rich and aromatic, with a lingering thickness which remains on the palate just a second longer than expected. Something to be savoured.It may as well be a tad spicy, but a delicately sweet and subtle spice. A cure for all that ails you; affectionately known as drinkable chocolate goop, but ultimately much more refined. My favourite hot chocolate.pink peppercorn hot chocolate (Serves 1-2)1/2 cup whole milk1/2 tsp cornstarch60g, 70% dark chocolate, shaved or finely chopped1 tbsp honey1/2 tsp best quality vanilla extract1/2 tsp crushed pink peppercorns1. Pre-heat cups with hot water, to help the hot chocolate remain hot.2. In a small saucepan, bring the milk and cornstarch to a simmer over medium-low heat.3. Lower the heat, and whisk in the chocolate, honey, vanilla and peppercorns, until velvety smooth.4. Empty the water from the cups, and dry.5. Pour the hot chocolate into cups, and garnish with additional whole peppercorns, or whipped cream. Enjoy!

Every day I drive by the store here in Calgary that sells these Pink peppercorns


The Second Item on my List: Red Curry paste

I have always wanted to try this and I do love my spices.

From lusciousfood.com

So here we go — first make the paste:
4 T tomato paste
1 small onion, peeled and quartered
1.5″ cube ginger, peeled and chopped
6 cloves garlic,
2T soy sauce
2T fish sauce (ours was fermented squid - don’t turn away! it’s what makes it so rich. trust me.)
1 tsp shrimp paste
1T paprika
3T chili powder
1 heaping T coriander seeds, ground
4 habanero peppers, seeds and all (if you’re brave!)
1/2 tsp turmeric
1T cumin
1/2 tsp cinnamon
1/2 tsp ground cardamom
2″ length of lemongrass stalk, chopped
Puree all ingredients in a food processor. The result should be a very thick paste, about the consistency of good tomato paste.
Now make the sauce:
1/2 an onion, chopped
1.5″ piece of peeled ginger, chopped or grated
1.5″ piece of lemongrass stalk, sliced very fine
1T butter
Sautee until the onion is soft. Stir in 4T of your delicious homemade curry paste, or to taste. Stir in one can of coconut milk. Simmer for 1/2 hour. You can add more curry paste if you want; the coconut milk really dilutes the heat. Tweak it to suit you - more heat, or more coconut milk. It’s all good.


That Darn Everlasting List

I have a long long list of all those recipes and foods I want to try but never seem to get around to. The list also seems to be growing endlessly. What to do! What to do! So I have played a trick on myself and have made a short list of no more than 5 items that I am attracted to at that moment, and when those are done I then can go onto the next 5. Sounds easy enough? Yes?

Homemade Hand Rolled Pasta

I have got to try this a least once, and without the pasta machine.


Plain Pasta Dough (Makes about 1 pound)
3 cups all-purpose flour
3/4 cup water
1 teaspoon salt
Place the flour in a mound on a large floured surface.
Make a well in the center. Add the water and salt.
Using a fork, gently start to work the flour into the liquid.
Continue until the dough becomes sticky and difficult to work with the fork.
Use your hands to form the rough dough into a ball. Let the dough rest for 10 minutes.
Knead the dough until it is smooth and elastic, about 10 minutes.
Divide the dough into 3 or 4 balls and let rest 30 minutes.
Roll out 1 ball at a time to the desired thickness, 1/8 to 1/16 inch, and cut into shapes.

From the website: mangiabenepasta

Monday, February 9, 2009

SENSUAL IS NOT JUST ABOUT SEX
Valentines or Romance isn't always about two peole in love, consider it also a trip into the sensual.
Our Senses: see the food, the colors the perfect ripe mango, bright yellow lemons. The smell. Oh yes all those wonderful smells. Fresh ground coffee beans. The thousands of wonderful tastes the earth has to offer. Honey, sour cream, bread and butter pickles, hot peppers. Touch! Yes touch your food! Eat with your fingers. Tear that bread apart, peel that orange with your fingers and let the juices run down your arms. Listen to your food. Hear the Olive oil being poured, the sizzle of that tender veal cutlet being browned or those onions being sauted . Set a beautiful table with fresh flowers, Herbs or Spices and visit Market Places as often as you can . Now all of this is Sensual.
Image was taken from a book I am reading called New Moroccan style the art of sensual living by Susan Sully

Sunday, February 8, 2009

Blue Moon a restaurant in Lima - Peru

Here is a very cool link that my online friend Oneluve sent. I wish I could display it here on the blog, but because it is a flash presentation it can not be embeded. Please click this link to see the Blue Moon a restaurant in Lima - Peru

Saturday, February 7, 2009

Favorite Food Blog - Megan's Munchies

I've got a confession to make, I'm not your regular kind of guy. I maintain a lot of different blogs (just check my profile), so my interest are varied. I love beautiful things of all types but I would rather surf food blogs than look at blogs featuring pretty girls. Food blogs are like a kind of porn for me, maybe it is my age, but at 47, I'm not that old. So I really don't understand myself.

What does that say about me?

That I'm crazy! Well at least I'm crazy over a well written food blog, one that has great photos of delicious looking food. And I want to start a regular feature here at FitzMocha, where I pick one of my favorite food blogs and write a quick description of it.

Magan's Munchies


First up is Megan's Munchies, this blog is simply delightful. It is regularly updated, and has a beautiful layout. There are many links on her blog list, which is another thing that I enjoy about good blogs, they are gateways to other good food blogs. And probably the number one reason that you would read a food blog is for the recipes and beautiful photos of food, well she has that area covered as well.

All in all, I give Magan's Munchies very high marks as a food blog and I read her often and hope you will too.

Friday, February 6, 2009

Friday Food Funnies - Juston Wilson

Justin Wilson's
Homegrown
Louisiana Cookin'
Justin Wilson's Homegrown Louisiana Cookin'
please click image


Another cooking show that I grew up watching was Justin Wilson's cooking show. He is also a comedian and I plan on posting some videos from his show and also some of his comedy.

New Orleans Cajun, Justin Wilson - Gumbo

Thursday, February 5, 2009

Romantic Food

It is the time of year where you may be thinking of serving some romantic dishes. I'll be the first to admit, that I love food to the point of being a romantic.

Doing a quick search for sites that offer ideas for romantic food.

The Romantic.com Recipes

Better Homes and Gardens 17 Romantic Food & Wine Parings

BeautyDen.com's How to Be Romantic With Food

FindLove KeepLove.com's Romantic Picnic Food Ideas

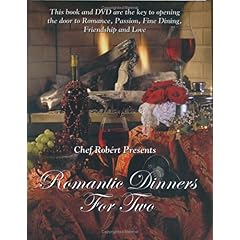
This search also brought up this book Romantic Dinners for Two: Create a Romantic Experience,Easy step by step instructions on how to Wine,Dine and Seduce your lover.

Romantic Dinners for Two
Romantic Dinners for Two: Create a Romantic Experience,Easy step by step instructions on how to Wine,Dine and Seduce your lover.
click image


According to the Midwest Book Review
As the title implies, "Romantic Dinners For Two" is a compilation of recipes and menus for the creation of three complete dinners for two special people. But not just for courting couples wanting the perfect date! These are dinners that would ably serve to make a special dining occasion for anniversary celebrations, birthdays, Valentine Day, Christmas, special announcements and events (like getting engaged or having a baby), or a simple romantic evening at home. "Romantic Dinners For Two" is more than just another theme cookbook as it also includes an instructional DVD with step-by-step cooking instructions that can turn even the most novice of kitchen cooks into accomplished chefs. There are tear out Invitations; tear out Seven Day Planners and Grocery Lists; advice for creating romantic scenarios and settings; suggestions for Mood Enhancers; questions that will serve to initiate conversation, final preparation and serving schedules for perfect presentation from beginning to end. Superbly illustrated with full color photos of finished dishes, "Romantic Dinners For Two" is a unique and enthusiastically recommended addition to any personal cookbook collection.