Monday, February 23, 2009

Now for Something plain and simple it needs no recipe.


Chili Lime Mango Slices

I love my Mango , but I am willing to try this.
Black Forest Gateau

Heston Blumenthal's Way

(A small note by Mochacoffee: I fell in love with this when I found it last year. The recipe may seem dauting and it does read like a book, but just look at those ingredients and tell me you would love a taste of this. I would love to try this, but I would have to read the recipe over and over again to visualize it in my head first. but I love challenges. Maybe for my 60th Birthday?)


I know what you're thinking. But bear with me. The key components of this German confection - chocolate, cherries and cream - are a sublime combination. My version is made up of six layers, most of which will work as desserts in their own right. Do have a go at the whole thing, though - you'll never think of the gateau the same way again.
I’m not sure why the black forest gateau of my childhood was never as good as it should have been. After all, chocolate, cherries and cream are three ingredients that go together well. However, leaden cream, dry sponge and cheap cooking chocolate conspired to make it cloying and virtually inedible, an utterly ersatz experience. I would try to pick the chocolate off the top, and even that would be disappointing. I’m not alone in this. I’ve come across almost nobody who harbours good memories of black forest gateau. So who ordered it and, more to the point, why? Did our parents really like it? Of course, it looked exotic. It offered the promise of luxury and indulgence, which is probably why it became part of a very British idea of the special occasion — an Abigail’s Party version of posh. Persuading people that it’s actually a perfect dessert was going to be a challenge. But I like a challenge. No food need be beneath contempt, and I wanted to prove that black forest gateau doesn’t have to be middle-brow. The liquid bitterness of the cherries complementing powerfully dark chocolate; the smooth mousse, rich cream and light sponge giving a lovely variety of textures; the touch of alcohol providing a lively surprise — do it right, and it becomes something wonderful. It's Gateau fabulous Although the Schwarzwälder Kirschtorte was created less than 100 years ago, its history is as impenetrable as parts of the Black Forest itself. Some say that it’s a tribute to the kirsch that plays such an important role in the cake’s distinctive flavour and is made in some 14,000 distilleries in the region. Whatever its origins, the first recipe appeared in 1934, and it has gone on to become the bestselling cake in Germany. To discover how a torte ought to taste, I ventured into the Black Forest. What better place to have a Konditorei, that excellent German combination of cake shop and cafe? The Café König opened in Baden-Baden 250 years ago and is still going strong. If any place was going to come up with a worthwhile slice of torte, surely this was it. In truth, I was slightly nervous about what I was going to eat. What if it was as disappointing as I remembered? The König’s gateau was a tall, sharp wedge crowned with chocolate flakes and a rounded hillock of cream topped with a cherry half. Beneath this, at least six layers of light and dark alternated. It wasn’t a cake so much as an architectural creation. The cream was rich, the mousse powerful but delicate; the kirsch had the sweet sharpness of a well-balanced spirit rather than the mule kick of a cheap one. The frozen cherries had an abundance of malic acid (an acid found in many fruits, especially apples: think of biting into a granny smith), which provided a perfect counterbalance to the fat of the cream. The chocolate had a cherry note that went well with the other flavours. All of it rested on a classic biscuit base. Although the true Schwarzwälder Kirschtorte was very different from the Great British gateau, I could see how one had gradually been transformed (and traduced) into the other. I was looking forward to fooling around with the torte’s complex architecture, and I could see ways in which I might still be able to summon up — in a pleasant form — some of the nostalgia surrounding the humble, misconstrued gateau. Combining the two would make a cake that was really special.


The recipesMakes 3 cakes, each to serve 4-6 Here it is — a black forest gateau, composed of six delicious layers: a madeleine biscuit base, topped with aerated chocolate, chocolate sponge, kirsch cream, chocolate ganache and chocolate mousse. One of the beauties of this recipe is its adaptability. The layers don’t have to be assembled into a cake: many can be served up as desserts in their own right. Kids and grown-ups alike will love the chocolate mousse and aerated chocolate. Serving kirsch cream with a bowl of cherries would be an interesting echo of the cake’s origins. This really is six recipes in one — and the possibilities are almost endless. More than any other dish, perhaps, this one can be let down by its ingredients.

The salt plays a pivotal role, enhancing the flavours and tempering the cake’s sweetness. And it is absolutely vital that you use the best chocolate, sour cherries and kirsch that you can get. The kirsch is especially important: I recommend Franz Fies, but if you can’t obtain that, look for one that is smooth, aromatic and full-flavoured. As this recipe makes three cakes, you can either freeze the cakes you don’t want to use at once, or make up one cake and save the rest of the prepared ingredients.

Special equipment
21.5cm x 31.5cm brownie tin(s), food mixer (optional), oven thermometer, 2.6-litre hard plastic container with lid (through which you have bored a small hole, using a corkscrew), microwave (if you have one), whipping-cream canister and charges (from
www.creamsupplies.co.uk), vacuum-seal storage bag with one-way valve, vacuum cleaner, digital probe, 9cm x 19cm x 5cm-deep baking tin(s), piping bag, melon- baller, large cardboard box, paint gunTiming

Lots of layers mean lots of different cooking techniques. To assemble a whole cake in one day would, undeniably, be a fair amount of work. Better to think of this as architecture — a flat-pack gateau — and spread out the building tasks. Prepare the chocolate sponge and kirsch cream up to a month in advance and keep them in the freezer, and make the biscuit base up to a week in advance, keeping it in an airtight container. The aerated chocolate can be prepared any time: it will keep well in the fridge if sealed properly. That leaves only two layers to prepare on the day: the chocolate ganache and the chocolate mousse — neither of which is particularly laborious.

Madeleine biscuit base

50g unsalted butter 1 large egg (60g)30g honey 60g plain flour30g icing sugar, siftedtsp (5g) baking powder Pinch of table salt1 tbsp (15ml) whole milk 1 Heat the oven to 200C/400F/Gas Mark 6. Line a 21.5cm x 31.5cm brownie tin with greaseproof paper or a little butter. 2 Melt the butter over a low heat, then leave to cool a little. 3 In a separate bowl, beat the egg and honey together for 5 minutes, or until white and thick. A food mixer with a paddle attachment is ideal for this job. 4 Gradually add all the dry ingredients, then the cooled butter and finally the milk. Mix until they are just combined. Do not overbeat. 5 Pour the mixture into the brownie tin. Bake for 10 minutes, or until a pale golden brown. 6 Turn the oven down to 100C/200F/Gas Mark . Use an oven thermometer to check this. Cut the biscuit base into three 8cm x 18cm rectangles. It’s not essential to be exact — they will need to be trimmed again when assembling the gateau. Lift them out of the tin and place on a baking tray. 7 Bake in the low oven for 20 minutes, until deep golden brown and crisp. Leave to cool, then store in an airtight container.

Aerated chocolate layer

Here, it is a good idea to get all the equipment ready beforehand, so that the chocolate goes through the process quickly, stays liquid and gets well aerated.
500g top-quality milk chocolate (such as Valrhona’s Tanariva)65g groundnut oil

1 Line the 2.6-litre plastic container with greaseproof paper.
2 Break the chocolate into chunks and place in a medium-sized glass bowl. Place the bowl over a saucepan of simmering water and let the chocolate melt. (The bowl needs to be large enough so it can sit on top of the saucepan without its base touching the water: the aim is to soften the chocolate on the gentlest of heats, so it doesn’t go grainy.) Alternatively, melt the chocolate at high power in a microwave for 1–2 minutes. Again, be careful not to overheat it.
3 Place a whipping-cream canister in a bowl or pan of boiling water. (Warming the canister ensures that the chocolate stays molten when poured into it.)
4 Stir the oil into the bowl containing the melted chocolate, then pour it all into the whipping-cream canister. Attach the canister cap, and charge with three charges.
5 Shake the canister, then squirt the chocolate onto the base of the 2.6-litre plastic container. Put on the lid, then place the container in the vacuum storage bag. Position the storage bag’s valve over the hole in the container’s lid. Switch on the vacuum cleaner and place the hose on the valve to suck the air out of the bag. The chocolate should rise and be riddled with small bubbles. As soon as it does so, remove the vacuum and close the valve as quickly as possible. To set the chocolate, place the box — still in the vacuum bag — in the fridge until required.

Flourless chocolate sponge

65g top-quality dark chocolate (such as Amedei’s Toscano Black 66%)7 egg yolks (140g)130g unrefined caster sugar 15g good-quality cocoa powder (such as Green & Black’s Organic), sifted 5 egg whites (150g)

1 Preheat the oven to 180C/350F/Gas Mark 4. Line a 21.5cm x 31.5cm brownie tin with greaseproof paper or a little butter.
2 Break the chocolate into chunks and place in a glass bowl. Place the bowl over a saucepan of simmering water and let the chocolate melt (or heat the chocolate at high power in a microwave for 1–2 minutes). Leave to cool.
3 Beat the egg yolks with 65g of the caster sugar for 5 minutes, or until white and thick. (A food mixer with a whisk attachment can perform this task.) Stir in the cocoa powder and the melted, cooled chocolate.
4 Whisk the egg whites with the remaining sugar in a separate bowl until soft peaks form. (The mixer can do this job too. If you have only one mixer bowl, a similarly sized glass or stainless steel bowl will work. Make sure it is spotlessly clean: a dirty bowl is the most common reason for egg whites not stiffening.)
5 Gradually fold the egg whites into the egg-yolk mixture, then pour this mixture into the brownie tin and bake for 20–25 minutes. The surface of the cake will look a little dry when removed from the oven, and it may sink slightly. Leave it to cool before cutting into three 8cm x 18cm rectangles.

Kirsch cream

2 sheets of leaf gelatin 5 egg yolks (100g)90g unrefined caster sugar 250ml whole milk 220ml whipping cream 20ml top-quality kirsch
1 Line a 21.5cm x 31.5cm brownie tin with clingfilm.
2 Place the sheets of gelatin in a small bowl and pour over 100ml cold water. Leave for 15 minutes, until soft.
3 Beat the egg yolks with the sugar for 5 minutes, or until white and thick. (The food mixer can do this job.)
4 Gently warm the milk in a small pan. Remove from the heat and stir in the beaten egg-yolk mixture. Return to a medium heat and cook for a further 2–3 minutes, stirring frequently. Use a digital probe to monitor when the temperature of the mixture reaches 80C/175F, at which point it should be taken off the heat. (It will have become thicker, with tiny bubbles appearing on the surface.)
5 Drain the gelatin and stir it into the warm mixture. (Make sure the mixture is not too hot, or the gelatin will break. Make sure, too, that all the gelatin dissolves.) Leave until lukewarm.
6 Meanwhile, lightly whip the cream, then add the kirsch. Fold this into the cooled gelatin mixture, then pour the mixture into the brownie tin and place it in the freezer to set for at least 1 hour.

About Kirsch

Good kirsch is integral to this recipe, and the quality of the spirit is very important. Here are some pointers:
- It musn’t be too sweet. - I like to use one with 50% alcohol — strong enough to stand up to the chocolate. - Look for a brand that is aromatic and flavoursome. I recommend Franz Fies. - Selfridges’ wine department has a very good spirits range, as does Fortnum & Mason, from which you can also buy online at
www.fortnumandmason.com.

Cherry stalks

To make the cherry “stalks”, you need six plump vanilla pods. Cut them into four lengthways, tie a knot at the end of each strip, then twist it to give a gnarled effect. Place on a plate and leave to dry overnight at room temperature.

You’ve made the biscuit base, the chocolate sponge, the kirsch cream and the decorative stalks for the cherries. Now you need to make the remaining two recipes and assemble the gateau.
You’ll also need the following for the final touches. 1 jar of apricot baking glaze 1 jar of top-quality wild cherries in heavy syrup (eg Griottines, or Amarena Fabbri if you can get them) 30ml top-quality kirsch (eg Franz Fies)500g top-quality dark chocolate (such as Amedei’s Toscano Black 66%) 150g groundnut oil Line a 5cm-deep, 9cm x 19cm loaf tin with clingfilm.

Now make the chocolate ganache.

Chocolate ganache

95ml whipping cream 1 tsp glucose syrupPinch of table salt95g top-quality dark chocolate (such as Amedei’s Porcelana) 20g unsalted butter, diced
1 Gently heat the cream, glucose syrup and salt. Break the chocolate into a bowl, then stir in the warm cream. When the chocolate has melted entirely, add the butter and stir until that too has melted. Spoon the mixture into a piping bag and place it in the fridge for at least an hour to firm up.
2 Meanwhile, if need be, trim the madeleine base so that it will fit the bottom of the loaf tin, with a 5mm gap between it and the sides of the tin. Trim the flourless chocolate sponge to the same dimensions as the madeleine base. Cut the aerated chocolate to these dimensions, and trim it so that it is no more than 1cm thick.
3 Before putting the madeleine base into the tin, spread it with a generous layer of apricot baking glaze. Put the aerated chocolate on top and place these in the bottom of the tin.
4 Remove the piping bag containing the ganache from the fridge. Along the length of the top of the aerated chocolate, about 2–3mm from the edge, pipe a thick line of ganache. Repeat on the other side. (Looked at from above, the rectangle of aerated chocolate should now have two stripes of ganache, each running parallel to the longer edges.)
5 Drain the cherries and reserve the syrup. Fill the gap between the two lines of ganache with a double row of cherries. (The idea is that every person is served a slice containing a pair of cherries, so calculate the number you’ll need accordingly and be sure to space them well. Keep in mind roughly where you’ve placed them — you’ll need to know later.)
6 Mix 60ml of the reserved cherry syrup with the kirsch. Dip the chocolate sponge in this soaking syrup, then position it on top of the ganache and cherries.
7 Remove the kirsch cream from the freezer and trim it to the same dimensions as the other layers. Manoeuvre it on top of the chocolate sponge, using a palette knife or fish slice.

Put the gateau in the freezer while you prepare the chocolate mousse.

Chocolate mousse
4 egg yolks (80g)200g unrefined caster sugar 100ml whole milk150g top-quality dark chocolate (such as Amedei’s Chuao) Generous pinch of table salt 200ml whipping cream
1 Beat the egg yolks with the sugar for 5 minutes, until white and thick. (A food mixer with a paddle attachment can be used for this.)
2 Gently warm the milk in a small pan. Remove it from the heat and stir in the beaten egg yolks. Return to a medium heat and cook for 2–3 minutes, stirring frequently. Use a digital probe to monitor when the temperature of the mixture reaches 80C/175F, then remove from the heat.
3 Finely chop the chocolate and place it in a medium-sized bowl. Pour the warm milk and eggs over the chocolate and stir until the chocolate has melted. Add the salt and leave to cool.
4 Whip the cream until soft peaks form. Fold the cream into the cooled chocolate mixture.

5 Remove the gateau from the freezer. Make sure the clingfilm is taut against the sides of the tin. Pour the chocolate mousse down the sides of the tin until it reaches a level 1cm above the kirsch cream layer. Return the gateau to the freezer and leave it for at least an hour, to firm up the layer of mousse.

6 Using a melon-baller, scoop out a double row of indentations along the gateau. (Ideally, they should be above the cherries that were added earlier.) Return the gateau to the freezer for a least an hour: it needs to be properly frozen in order to get the right effect with the chocolate coating.

7 For the coating, break the chocolate into chunks and place in a small glass bowl. Melt the chocolate by placing the bowl over a pan of simmering water, or by heating it at high power in a microwave for about 2 minutes. Leave to cool slightly before stirring in the groundnut oil. (If you don’t plan to coat the cake with the paint gun, take 100g of this chocolate, cut it into shavings and scatter over the cake just before serving.)

8 Fill the base of the paint gun with the melted chocolate mixture and attach the nozzle. To avoid redecorating the kitchen in chocolate brown, set the large cardboard box on its side (which effectively provides a protective roof and walls to work in). Remove the gateau from the freezer. Carefully lift it out of the loaf tin and onto a plate. Remove the clingfilm and place the gateau in the cardboard box. Spray the gateau with the chocolate, turning carefully as you go. Return it to the freezer until 20 minutes before serving.

9 Use a skewer to bore a small hole 2–3in into the centre of the bottom of each indentation, down towards the cherry below. Agitate the skewer a little to increase the hole’s diameter. Pour in cherry syrup until it reaches the top of the bore-hole (but doesn’t spill out into the indentation itself). Place a sour cherry, stalk end up, in each indentation, and sit a dried vanilla pod in each cherry, to make a decorative stalk. For the full effect, fill an atomiser with kirsch and squirt it round the room just before serving the gateau — it will magically bring a little of the Black Forest to the dinner table.

The perfect chocolate sorbet

Still haven’t had enough chocolate?

Then top up your quota with this. You’ll need an ice-cream maker. Serves 6 500g semi-skimmed milk60g glucose 60g cocoa powder 340g fine 33% milk chocolate, in pieces Place 500ml water in a pan with the milk and glucose. Bring to the boil, add cocoa and simmer for 6 minutes. Remove from the heat, add the chocolate and stir until melted. Pour into a bowl and place it into another, larger bowl of iced water. Allow to cool until the mixture reaches 40C. Pour into the ice-cream machine and churn as per the manufacturer’s instructions.

Extracted and adapted from In Search of Perfection by Heston Blumenthal - Bloomsbury
Ginger Macaroons


One of the few cookies I make year round or used to make as I live on my own now, and I would eat them all if they were there. I have never tried the fresh grated ginger. I also Love Ginger, so I am sure these are delicious.

From Chef-girl.net


3 cups flaked coconut2/3 cup white sugar3 egg whites1 teaspoon freshly grated ginger (or a little bit more if you’re like me, and love the stuff)
Mix all the ingredients together in a large-ish bowl.Drop by teaspoonful onto a lined baking sheet. (I used my Silpat sheet, but parchment paper would work too)Bake for 10-12 minutes at 350ºF or until golden on the edges.
Notes:I found that letting the macaroons cool for a minute or two on the baking sheet makes them much easier to remove.

Monday, February 16, 2009

From the Book The Joy of Cookies by Sharon Tyler Herbst

I make these when I get bored with Banana Bread

West Indies Banana Ginger Cookies

1.)Bowl #1: Combine 2c. Flour, 1 tsp. baking powder, 3/4 tsp. cinnamon, 1/2 tsp. nutmeg, 1/4 tsp. ground cloves and 1/4 tsp. salt.
2.) Bowl # 2: Combine 1/2 c. soft butter, 1.c Sugar, 1and1/2 tsp. vanilla and 2 eggs. Add to dry ingredients.
3.) Then add 1 c. mashed ripe banana, 1/3 c. minced crystallized Ginger and 1/2 c. raisins.

Drop by the teaspoon full onto lightly greased cookie sheets
bake in a preheated oven of 375 for about 6-8 mins.

When a bit cooler dust with icing sugar
I have found these to be a soft cookie almost cake like,but I enjoyed them. I have at times used ground ginger when crystallized ginger was not in my cupboard.


FOR THE LOVE OF MARKET PLACES

I was introduced to open air market places when I lived and worked in Germany I remember going for fresh milk and crusty buns every morning. I remember walking down the crowded isles, seeing all the colours and the smells, everything from herbs and spices to fish. I was introduced to open air markets once again when I went to the Caribbean isle of Grenada (the spice isle) There I fell in love with Mangoes, Breadfruit, Calalou and Okra. I would Love to visit a market place on every continent.

Thursday, February 12, 2009


Mango Ice Cream is My ultimate favorite in the world! Oh Yes !


HOMEMADE MANGO ICE CREAM

4 c. peeled mango slices, chopped fine1 c. sugar4 (13 oz.) cans sweetened milk, chilled1/2 gal. Half and Half6 eggs, well beaten1 tbsp. vanilla extract1 tsp. almond extract
Combine mango slices and sugar in a microwave proof bowl. Heat until sugar dissolves. Place in refrigerator to chill slightly. In a churn, combine sweetened condensed milk, Half and half, eggs and extracts. Add chilled mango mixture. Follow manufacturer's directions for making ice cream.


My Fifth item on my list: Homemade Limoncello
Keep your bottles of limoncello in the freezer until ready to serve. The ingredients are simple and few, and making a batch doesn't require much work, but you'll need some time.
Limoncello must steep for (80) eighty days.


Ingredients
15 lemons* 2 bottles (750 ml) 100-proof vodka** 4 cups sugar 5 cups water * Choose thick-skinned lemons because they are easier to zest.** Use 100-proof vodka, which has less flavor than a lower proof one. Also the high alcohol level will ensure that the limoncello will not turn to ice in the freezer.

PreparationWash the lemons with a vegetable brush and hot water to remove any reside of pesticides or wax; pat the lemons dry. Carefully zest the lemons with a zester or vegetable peeler so there is no white pith on the peel. NOTE: Use only the outer part of the rind. The pith, the white part underneath the rind, is too bitter and would spoil your limoncello. Check out my web page on How to Zest.Step One: In a large glass jar (1-gallon jar), add one bottle of vodka; add the lemon zest as it is zested. Cover the jar and let sit at room temperature for at least (10) ten days and up to (40) days in a cool dark place. The longer it rests, the better the taste will be. (There is no need to stir - all you have to do is wait.) As the limoncello sits, the vodka slowly take on the flavor and rich yellow color of the lemon zest. Step Two: In a large saucepan, combine the sugar and water; cook until thickened, approximately 5 to 7 minutes. Let the syrup cool before adding it to the Limoncello mixture. Add to the Limoncello mixture from Step One. Add the additional bottle of vodka. Allow to rest for another 10 to 40 days. Step Three: After the rest period, strain and bottle: discarding the lemon zest. Keep in the freezer until ready to serve.

My fourth item on my list
from indiaforvisitors

Naan Bread Servings 14 pieces

Ingredients
.25 oz Active Dry Yeast
4 tbsp White Sugar
1 cup Warm Water
1 Beaten Egg
3 tbsp Milk
2 tsp Salt
4 1/2 cup Bread Flour
2 tsp Minced Garlic
1/4 cup Melted Butter

Preparation
In a large bowl, dissolve yeast in warm water. Proof until frothy. Stir in sugar, milk, egg, salt, and enough flour to make a soft dough. Knead for 6 to 8 minutes on a lightly floured surface, or until smooth. Place dough in a well oiled bowl, cover with a damp cloth, and set aside to rise. Let it rise until the dough has doubled in volume.
Punch down dough, and knead in garlic. Pinch off small amounts of dough to make 12 to 14 pieces. Roll into balls, and allow to rise again.
While the dough is rising, preheat grill to high.
At grill side, roll one ball of dough out into a thin circle. Lightly oil grill. Place dough on grill, and cook for 2 to 3 minutes, or until puffy and lightly browned. Brush uncooked side with butter, and turn over. Brush cooked side with butter, and cook until done, another 2 to 4 minutes. Remove from grill, and continue cooking until all the naan has been prepared.
You can lightly sprinkle some more garlic on top for garnish


This is my 3rd item on my list

"pinkpeppercorn.blogspot.com"

I do not go to her site often enough and what a site full of class and such good taste.


pink peppercorn hot chocolate
Winter is a time to be cozy, curl-up and cuddle. It becomes exquisitely delicious and enticing with hot chocolate. It should be rich and aromatic, with a lingering thickness which remains on the palate just a second longer than expected. Something to be savoured.It may as well be a tad spicy, but a delicately sweet and subtle spice. A cure for all that ails you; affectionately known as drinkable chocolate goop, but ultimately much more refined. My favourite hot chocolate.pink peppercorn hot chocolate (Serves 1-2)1/2 cup whole milk1/2 tsp cornstarch60g, 70% dark chocolate, shaved or finely chopped1 tbsp honey1/2 tsp best quality vanilla extract1/2 tsp crushed pink peppercorns1. Pre-heat cups with hot water, to help the hot chocolate remain hot.2. In a small saucepan, bring the milk and cornstarch to a simmer over medium-low heat.3. Lower the heat, and whisk in the chocolate, honey, vanilla and peppercorns, until velvety smooth.4. Empty the water from the cups, and dry.5. Pour the hot chocolate into cups, and garnish with additional whole peppercorns, or whipped cream. Enjoy!

Every day I drive by the store here in Calgary that sells these Pink peppercorns


The Second Item on my List: Red Curry paste

I have always wanted to try this and I do love my spices.

From lusciousfood.com

So here we go — first make the paste:
4 T tomato paste
1 small onion, peeled and quartered
1.5″ cube ginger, peeled and chopped
6 cloves garlic,
2T soy sauce
2T fish sauce (ours was fermented squid - don’t turn away! it’s what makes it so rich. trust me.)
1 tsp shrimp paste
1T paprika
3T chili powder
1 heaping T coriander seeds, ground
4 habanero peppers, seeds and all (if you’re brave!)
1/2 tsp turmeric
1T cumin
1/2 tsp cinnamon
1/2 tsp ground cardamom
2″ length of lemongrass stalk, chopped
Puree all ingredients in a food processor. The result should be a very thick paste, about the consistency of good tomato paste.
Now make the sauce:
1/2 an onion, chopped
1.5″ piece of peeled ginger, chopped or grated
1.5″ piece of lemongrass stalk, sliced very fine
1T butter
Sautee until the onion is soft. Stir in 4T of your delicious homemade curry paste, or to taste. Stir in one can of coconut milk. Simmer for 1/2 hour. You can add more curry paste if you want; the coconut milk really dilutes the heat. Tweak it to suit you - more heat, or more coconut milk. It’s all good.


That Darn Everlasting List

I have a long long list of all those recipes and foods I want to try but never seem to get around to. The list also seems to be growing endlessly. What to do! What to do! So I have played a trick on myself and have made a short list of no more than 5 items that I am attracted to at that moment, and when those are done I then can go onto the next 5. Sounds easy enough? Yes?

Homemade Hand Rolled Pasta

I have got to try this a least once, and without the pasta machine.


Plain Pasta Dough (Makes about 1 pound)
3 cups all-purpose flour
3/4 cup water
1 teaspoon salt
Place the flour in a mound on a large floured surface.
Make a well in the center. Add the water and salt.
Using a fork, gently start to work the flour into the liquid.
Continue until the dough becomes sticky and difficult to work with the fork.
Use your hands to form the rough dough into a ball. Let the dough rest for 10 minutes.
Knead the dough until it is smooth and elastic, about 10 minutes.
Divide the dough into 3 or 4 balls and let rest 30 minutes.
Roll out 1 ball at a time to the desired thickness, 1/8 to 1/16 inch, and cut into shapes.

From the website: mangiabenepasta

Monday, February 9, 2009

SENSUAL IS NOT JUST ABOUT SEX
Valentines or Romance isn't always about two peole in love, consider it also a trip into the sensual.
Our Senses: see the food, the colors the perfect ripe mango, bright yellow lemons. The smell. Oh yes all those wonderful smells. Fresh ground coffee beans. The thousands of wonderful tastes the earth has to offer. Honey, sour cream, bread and butter pickles, hot peppers. Touch! Yes touch your food! Eat with your fingers. Tear that bread apart, peel that orange with your fingers and let the juices run down your arms. Listen to your food. Hear the Olive oil being poured, the sizzle of that tender veal cutlet being browned or those onions being sauted . Set a beautiful table with fresh flowers, Herbs or Spices and visit Market Places as often as you can . Now all of this is Sensual.
Image was taken from a book I am reading called New Moroccan style the art of sensual living by Susan Sully

Sunday, February 8, 2009

Blue Moon a restaurant in Lima - Peru

Here is a very cool link that my online friend Oneluve sent. I wish I could display it here on the blog, but because it is a flash presentation it can not be embeded. Please click this link to see the Blue Moon a restaurant in Lima - Peru

Saturday, February 7, 2009

Favorite Food Blog - Megan's Munchies

I've got a confession to make, I'm not your regular kind of guy. I maintain a lot of different blogs (just check my profile), so my interest are varied. I love beautiful things of all types but I would rather surf food blogs than look at blogs featuring pretty girls. Food blogs are like a kind of porn for me, maybe it is my age, but at 47, I'm not that old. So I really don't understand myself.

What does that say about me?

That I'm crazy! Well at least I'm crazy over a well written food blog, one that has great photos of delicious looking food. And I want to start a regular feature here at FitzMocha, where I pick one of my favorite food blogs and write a quick description of it.

Magan's Munchies


First up is Megan's Munchies, this blog is simply delightful. It is regularly updated, and has a beautiful layout. There are many links on her blog list, which is another thing that I enjoy about good blogs, they are gateways to other good food blogs. And probably the number one reason that you would read a food blog is for the recipes and beautiful photos of food, well she has that area covered as well.

All in all, I give Magan's Munchies very high marks as a food blog and I read her often and hope you will too.

Friday, February 6, 2009

Friday Food Funnies - Juston Wilson

Justin Wilson's
Homegrown
Louisiana Cookin'
Justin Wilson's Homegrown Louisiana Cookin'
please click image


Another cooking show that I grew up watching was Justin Wilson's cooking show. He is also a comedian and I plan on posting some videos from his show and also some of his comedy.

New Orleans Cajun, Justin Wilson - Gumbo

Thursday, February 5, 2009

Romantic Food

It is the time of year where you may be thinking of serving some romantic dishes. I'll be the first to admit, that I love food to the point of being a romantic.

Doing a quick search for sites that offer ideas for romantic food.

The Romantic.com Recipes

Better Homes and Gardens 17 Romantic Food & Wine Parings

BeautyDen.com's How to Be Romantic With Food

FindLove KeepLove.com's Romantic Picnic Food Ideas

This search also brought up this book Romantic Dinners for Two: Create a Romantic Experience,Easy step by step instructions on how to Wine,Dine and Seduce your lover.

Romantic Dinners for Two
Romantic Dinners for Two: Create a Romantic Experience,Easy step by step instructions on how to Wine,Dine and Seduce your lover.
click image


According to the Midwest Book Review
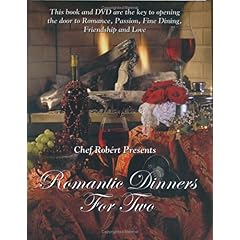
As the title implies, "Romantic Dinners For Two" is a compilation of recipes and menus for the creation of three complete dinners for two special people. But not just for courting couples wanting the perfect date! These are dinners that would ably serve to make a special dining occasion for anniversary celebrations, birthdays, Valentine Day, Christmas, special announcements and events (like getting engaged or having a baby), or a simple romantic evening at home. "Romantic Dinners For Two" is more than just another theme cookbook as it also includes an instructional DVD with step-by-step cooking instructions that can turn even the most novice of kitchen cooks into accomplished chefs. There are tear out Invitations; tear out Seven Day Planners and Grocery Lists; advice for creating romantic scenarios and settings; suggestions for Mood Enhancers; questions that will serve to initiate conversation, final preparation and serving schedules for perfect presentation from beginning to end. Superbly illustrated with full color photos of finished dishes, "Romantic Dinners For Two" is a unique and enthusiastically recommended addition to any personal cookbook collection.

Wednesday, February 4, 2009

Julia Child - The French Chef DVD

Mocha's last post inspired me to post some video of Julia Child. I grew up watching her show. I love her voice, and mannerisms, and I think she was a wonderful teacher and Chef.

Julia Child making omelette


You can get her early shows on DVD.

Julia Child - The French Chef
Julia Child - The French Chef DVD
please click image for info @Amazon.com


According to Lynn Gibson:
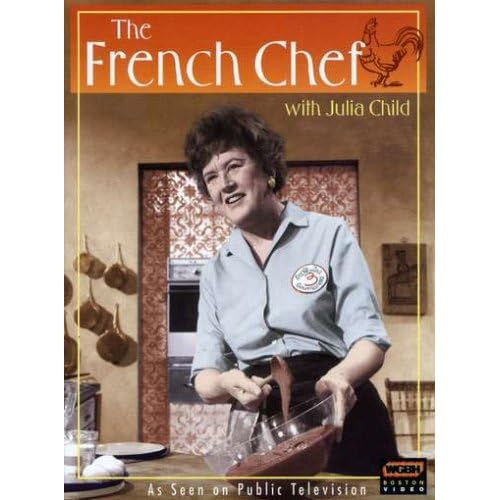
Three servings of practical cooking advice per one serving of nostalgia is the recipe for this 18-episode culinary collector’s item. The French Chef with Julia Child, the pioneering public television series which premiered in 1962, brought French cuisine to American kitchens without a dash of pretension. Child (1912-2004), a cooking legend and cultural icon with her 6’2" commanding-yet-self-deprecating presence, leads viewers through some of her favorite and classic recipes with requisite humor and congeniality. The three-disc compilation is divided into Starters and Side Dishes; Main Courses; and Desserts and Other Classics, and includes several printable recipes from each category. In vintage black and white, the collection begins with "The Potato Show" and Child’s sage counsel, "When you flip anything you must have the courage of your convictions," before she flips half of her sautéed potatoes onto the stovetop. Peppered throughout the collection are such reminders of why Child was so endearing: she let the camera roll through all her culinary disasters. In another show, "To Roast a Chicken," Child lines up five headless poultry as if arranging for a family photo, while earnestly discussing the differences between a fryer and a roaster, the "full glory of its chickendom." Even non-gourmands will find themselves captivated by such vintage entertainment, while passionate epicureans will relish step-by-step demonstrations of wonders such as boeuf bourguignon (from her debut show), salad Nicoise, bouillabaisse a la Marseillaise, and mousse au chocolat.


Each DVD contains a couple of printable recipes, and there's also a Julia Biography.

The 18 episodes on the three-disc DVD are:

Starters and Sidedishes
1. The potato show
2. Your own french onion soup
3. Bouilabaisse à la Marseillaise
4. The spinach twins
5. Salad Niçoise
6. French fries

Main Courses
1. Bœuf Bourguignon
2. To roast a chicken
3. The lobster show
4. To stuff a sausage
5. Tripes à la mode
6. The whole fish story

Baking, Desserts, and other Classics
1. Queen of sheba cake
2. Cheese and wine party
3. Apple dessert
4. Mouse au chocolat
5. The good loaf
6. The omelette show

Tuesday, February 3, 2009


French Onion Soup

I love my Soups during Our Winter Seasons and make this often.


Soupe a l’Oignon [Onion Soup]Mastering the Art of French Cooking
1 1/2 pounds or about 5 cups of thinly sliced yellow onions (Deb note: I find even 6-7 cups is never too much)3 tablespoons butter1 tablespoon oilA heavy-bottomed 4-quart covered saucepan1 teaspoon salt1/4 teaspoon sugar (helps the onions to brown)3 tablespoons flour2 quarts boiling brown stock, canned beef bouillon, or 1 quart of boiling water and 1 quart of stock or bouillon1/2 cup dry white wine or dry white vermouthSalt and pepper to taste3 tablespoons cognacRounds of hard-toasted French bread (see following recipe)1 to 2 cups grated Swiss or Parmesan cheese (Deb note: I always use cave-aged gruyere)
Cook the onions slowly with the butter and oil in the covered saucepan for 15 minutes.
Uncover, raise heat to moderate, and stir in the salt and sugar. Cook for 30 to 40 minutes stirring frequently, until the onions have turned an even, deep, golden brown.
Sprinkle the flour and stir for three minutes.
Off heat, blend in the boiling liquid. Add the wine and season to taste. Simmer partially covered for 30 to 40 minutes of more, skimming occasionally. Correct seasoning.
(*) Set aside uncovered until ready to serve. Then reheat to the simmer.
Just before serving, stir in the cognac. Pour into a soup tureen or soup cups over the round of bread and pass the cheese separately. [Or, use following instructions for a baked cheese top.]
Soupe a’ L’Oignon Gratinee [Onion Soup Gratineed with Cheese]Mastering the Art of French Cooking
The preceeding onion soupA fireproof tureen or casserole or individual onion soup pots2 ounces Swiss cheese cut into very thin slivers1 tablespoon grated raw onion12 to 16 rounds of hard toasted French bread1/2 cups grated Swiss, or Swiss and Parmesan cheese
Preheat oven to 325 degrees.
Bring the soup to the boil and pour into the tureen or soup pots. Stir in the slivered cheese and grated onion. Float the rounds of toast on top of the soup, and spread the grated cheese over it. Sprinkle with the oil or butter. Bake for 20 minutes in the oven, then set for a minute or two under a preheated broiler to brown the top lightly. Serve immediately.

Monday, February 2, 2009

Time again for some Comfort Food


I have been having a craving for sweets lately - need to watch that :) and I have also been eating porridge every morning this winter - good for you :) So I though how about combining the two and have some Apple Crisp. (Image was taken from gypsysoul73.blogspot.com) There are many recipes and variations for crisps on the internet.
here is one recipe:


3 pounds tart apples
2 tablespoons lemon juice
1/2 cup light brown sugar, packed
1/2 teaspoon ground cinnamon
1/2 teaspoon ground nutmeg
1/3 cup all-purpose flour
1/3 cup granulated sugar
1/3 cup rolled oats
4 tablespoons cold butter (1/2 stick)
1/2 cup chopped walnuts or pecans
Preparation:Peel, core and chop the apples; toss in a bowl with lemon juice. In a separate bowl, combine the brown sugar, cinnamon, and nutmeg; add to the apples and toss to combine.
In another bowl combine flour, sugar and oats. Cut butter into 8 small pieces, and cut butter into flour with a pastry blender or two forks until mixture is crumbly. Stir in the chopped nuts.
Butter a 9-inch square baking dish. Spread apple mixture in bottom of baking dish then sprinkle with flour mixture. Bake at 375° for 30 to 45 minutes, or until apples are tender and topping is lightly browned.
Serve warm or at room temperature, with vanilla ice cream or a little heavy cream, if desired.

Music About Food from Ron

OK, here goes a little shameless promotion of another one of my blogs. My online friend, RocketM aka Ron, who contributes to our music blog KK & R Music Blog, recently wrote a post about music and food. Two of my favorite subjects.

You can read Ron's post here >>> Music about Food. My favorite of all the videos that he links to is Billy Joel's Scenes From an Italian Restaurant.

Billy Joel - Scenes From an Italian Restaurant